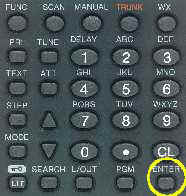
This tutorial covers programming Trunked EDACS frequencies into the Pro-92 Scanner.
For additional information on this product, see the links below:
| Step 1: Select the Channel | |
|
|
| Press MANUAL, enter the channel number where you want to store a frequency, then press MANUAL again. M and the channel number appear at the upper left corner on the display (for example, M000). | |
| Step 2: Enter Program Mode | |
![]() |
![]() |
| Press PGM. M changes to P on the display. | |
| Step 3: Enter the Frequency | |
![]() |
![]() |
| Use the number keys to enter the frequency (including the decimal point) you want to store. | |
| Click Here for the Police Call Frequency Lists on CD | |
| Step 4: Clear a Mistake | |
![]() |
![]() |
| If you make a mistake, hold down CL for about 0.5 seconds to delete a single digit and about 1.5 seconds to delete all digits. | |
| Step 5: Store the Frequency | |
![]() |
![]() |
| Press ENTER to store the frequency into the channel. The
blinking cursor disappears. Notes:
|
|
| Step 6: Turn Off Delay | |
![]() |
![]() |
| Press FUNC then press DELAY/1 to turn the delay function off, as this is a trunked frequency. | |
| Step 7: Select the Mode | |
![]() |
![]() |
| Press MODE until ED for EDACS systems appears. Then the next channel in sequence is ready for programming. | |
| Step 8: Program the Next Channel | |
![]() |
![]() |
| Press PGM or the UP ARROW key and then repeat Steps 3 through 7 until all needed frequencies are programmed. | |
| Step 9: Set the Bank Mode | |
![]() |
![]() |
| Press FUNC 2 to put the bank in open (+) or closed (-) mode. | |
| Step 10: Start Scanning | |
![]() |
![]() |
| To start scanning, press SCAN. | |
Copyright© RadioShack Corporation 2002. All rights reserved.