![]()
Note: If you make a mistake entering the ID, Invalid ID appears and the scanner beeps when you press ENTER. Start again at Step 4.

This is an introduction to storing Talk Group ID's on your PRO-92 and assigning a Text Tag to the ID. In order to store Talk Group ID's, you must already have the trunked frequencies programming in and scanning.
This tutorial uses the following in its examples:
Text is entered using the number pad. To enter a letter, you first select the letter group (such as 7 for PQRS), then press the number which corresponds to the letters place in sequence (P=1,Q=2,R=3, S=4). Use FUNC to change to lower case.
For additional information on this product, see the links below:
| Step 1: Enter the Programming Mode | |
|
|
| Press PGM. P appears in the upper left corner of the display. | |
| Step 2: Enter Trunk Mode | |
|
|
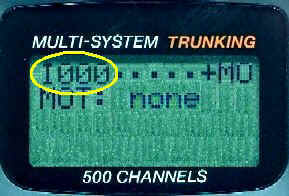
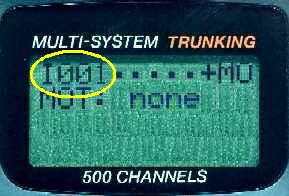
| Press TRUNK. I### (with ### being the ID channel number) appears. The display shows that it is in ID bank 0 (which is ID000 through ID099). | |
| Step 3: Select the Bank | |
|
|
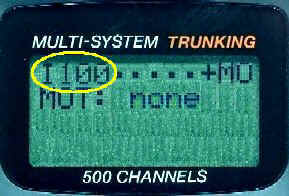
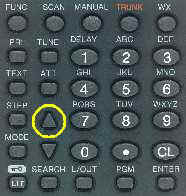
| To select a different bank to store the ID, press FUNC and then /\ or \/ to move up or down one bank. The display now shows that it is in ID bank1 (which is ID100 through ID199) | |
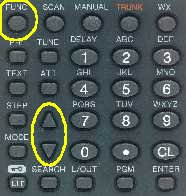
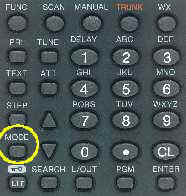
| Step 4: Select the Trunking Mode | |
|
|
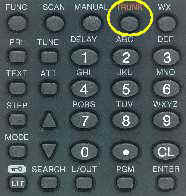
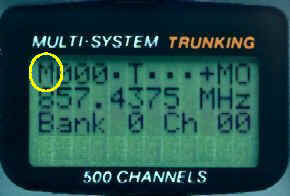
| Press MODE to select between Not trunked, LT (for LTR - EF Johnson systems), MO (for Motorola systems), or ED (for EDACS - GE/Ericsson systems). For our example, we have selected MO. | |
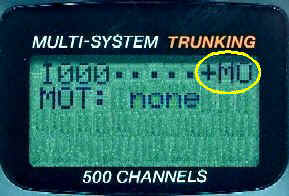
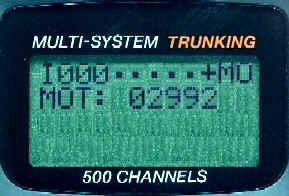
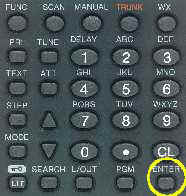
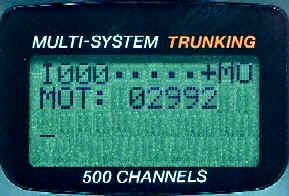
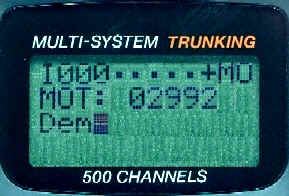
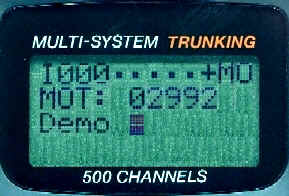
| Step 5: Enter the Talk Group ID | |
|
|
| Enter the talk group ID (ex. 02992)
using the number pad and press ENTER. If necessary, use the decimal point for a
hyphen. You can get a list of talk group ID's either by scanning the trunked system or
through a scanner list. Note: If you make a mistake entering the ID, Invalid ID appears and the scanner beeps when you press ENTER. Start again at Step 4. |
|
| Click Here for the Police Call Frequency Lists on CD | |
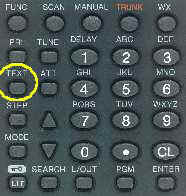
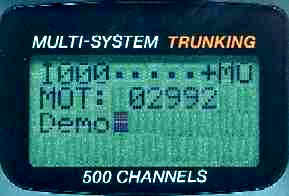
| Step 6: Enter the Bank Text Mode | |
|
|
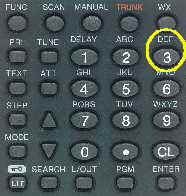
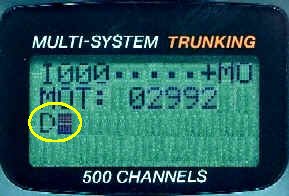
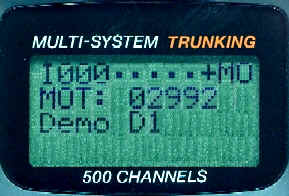
| When you have entered a valid ID, press TEXT. The cursor appears at the 3rd line on the display below MOT: 02992. | |
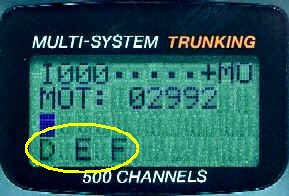
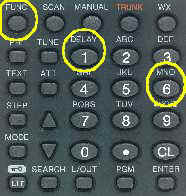
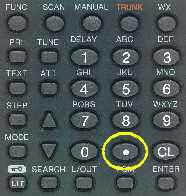
| Step 7: Select the Letter Group for "D" | |
|
|
| Before entering the actual letter, you must first select the group of letters by pressing the appropriate number key. The letter "D" is in the group over the number 3 (DEF), so press 3. The letters D E F appear under the cursor at the bottom of the display. | |
| Step 8: Select "D" | |
|
|
| The letter "D" is the first letter in the sequence (D=1, E=2, F=3) over the number 3, so press the number 1. The letter D appears and the cursor moves to the right. | |
| Step 9: Select "e" | |
|
|
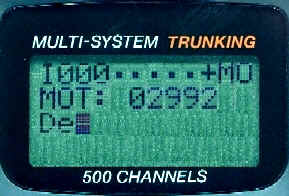
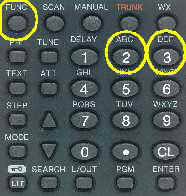
| The second character is "e". Select the group again by pressing 3. When the letters D E F appear at the bottom of the display under D and the cursor, press FUNC to change them to lowercase (d e f) and press 2 to select the letter e. | |
| Step 10: Select "m" | |
|
|
| The third character is "m". Select the group by pressing 6; M N O appear at the bottom of the display under De" and the cursor. Press FUNC to change them to lowercase (m n o), then press 1 to select the letter m. | |
| Step 11: Select "o" | |
|
|
| The fourth character is "o". Select the group by pressing 6 again; M N O appear at the bottom of the display under Dem and the cursor. Press FUNC to change them to lowercase (m n o), then press 3 to select the letter o. | |
| Step 12: Select a Space | |
|
|
| The fifth character is a space. Press the . (period) key to input a space. The cursor moves over one space. | |
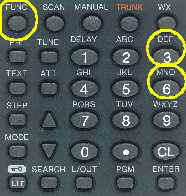
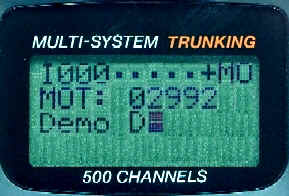
| Step 13: Select "D" | |
|
|
| The sixth character is "D". Select the group by pressing 3; D E F appear at the bottom of the display under Demo and the cursor. Press 1 to select the letter D. | |
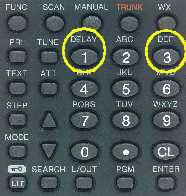
| Step 14: Select "1" | |
|
|
| The final character is "1". Numbers are accessed by pressing 1. The numbers 1234567890 appear at the bottom of the display under Demo B and the cursor. Press 1 to choose the number 1. | |
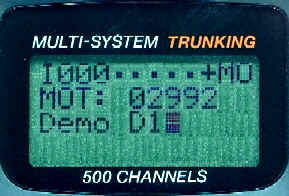
| Step 15: Store the Text Tag | |
|
|
| When you are finished programming the letters, press ENTER to save the text tag. The display returns the the ID screen and the ID text tag appears on the third row of the display. | |
| Step 16: Store the Next ID in Sequence | |
|
|
| To store the next ID memory in sequence, press /\ to go the next ID number, then repeat from Step 5 to enter more IDs. | |
| Step 17: Return to Programming Mode | |
|
|
| When you are finished storing ID's, return to the programming mode by pressing PGM. The display returns to the same channel as when you started. | |
| Step 18: Return to Manual Mode | |
|
|
| To exit programming mode, press MANUAL. The P changes to M. | |
Copyright© RadioShack Corporation 2002. All rights reserved.