This is a tutorial for searching the auto race bank for
active frequencies. The Auto Race Bank starts scanning at the last frequency scanned
using the Auto Race Bank and scans the following frequency ranges:
| Step 1: Enter Band Mode |
| |
 |
 |
| |
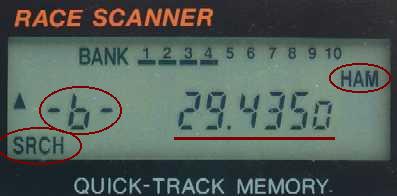
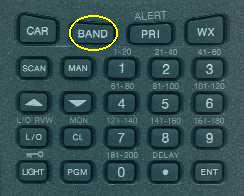
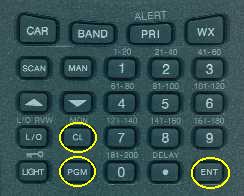
| Press BAND. The last selected band name (such as HAM),
SRCH, -b-, frequency and the group number (if any) appear. Note: -b- does not appear if the CAR service bank is
selected. |
| |
|
| Step 2: Select the Car Band |
| |
 |
|
| |
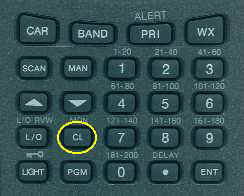
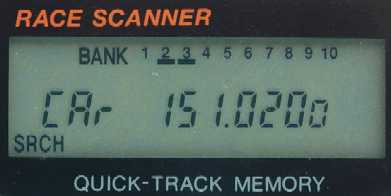
| To select the Racing band, repeatedly press BAND until CAr
and a frequency appears on the display, as above. After about 2 seconds, the scanner
begins searching rapidly in that band for an active frequency. A search arrow (/\
or \/) appears on the left side of the display indicating the search
direction (up or down). |
| |
|
| Step
3: Adjust the Search |
| |
|
 |
| |
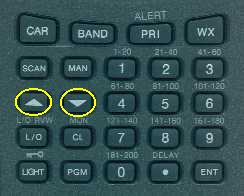
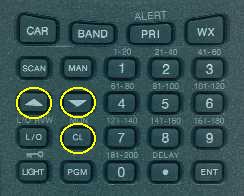
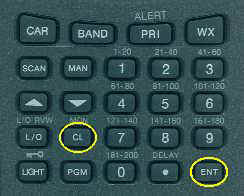
You can adjust your search in the following ways:
- To reverse the search direction at any time, hold down /\
or \/ for about 1 second.
- To search up or down the band in small increments,
repeatedly press /\ or \/. The search arrow on the
display (/\ or \/) disappears.
- To pause the search while receiving a signal, press /\
or \/. The search arrow on the display (/\ or \/)
disappears. To resume searching, hold down /\ or \/ for
about 1 second.
- To quickly move up or down through the frequencies, hold
down /\ or \/. The scanner tunes through the frequencies
until you release /\ or \/.
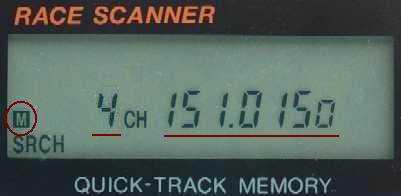
When the scanner finds an active frequency, it stops
searching and displays the frequency's number as above. In the example above, it stopped
on frequency 151.0100. |
| |
|
| Step 4: Store the Frequency in the Lowest Available Channel |
| |
 |
 |
| |
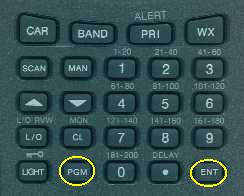
| To store the displayed frequency in the lowest available channel (in
this example, channel 4), press PGM then ENT. The channel and frequency
flash twice, and the scanner stores the displayed frequency. The scanner then continues to
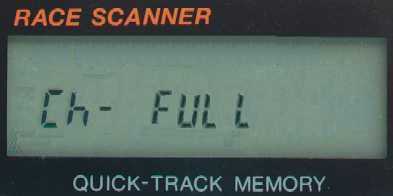
search for frequencies. If Ch-FULL
appears on the display, go to Step 6.
If -dUPL- appears on the display, go to Step 7. |
| |
|
| Step 5: Store the Frequency in a Specific Channel |
| |
|
 |
| |
| To store the displayed frequency in a channel you select, press PGM,
the channel number PGM (To store the frequency into channel 4, you would press PGM
4 PGM). The channel number flashes. If a
channel number you entered is already programmed with a frequency, the channel number and
the programmed frequency appear for about 2 seconds, then the channel number flashes and
the new frequency appears.
Press ENT to program the new frequency or press MON/CL
to cancel. If you press ENT, the channel and frequency flash twice, and the scanner
stores the displayed frequency. The scanner then continues to search for frequencies.
If -dUPL- appears on the display, go to Step 7. |
| |
|
| Step
6: If Ch-FULL Appears on the Display... |
| |
 |
 |
| |
Ch-FULL appears if there is not an empty
channel left. To store more frequencies, you must clear some channels.
- To continue searching after Ch-FULL
appears, hold down /\ or \/.
- To remain on the frequency after Ch-FULL
appears, press MON/CL. Ch-FULL disappears.
|
| |
|
| Step
7: If -dUPL- Appears on the Display... |
| |
 |
 |
| |
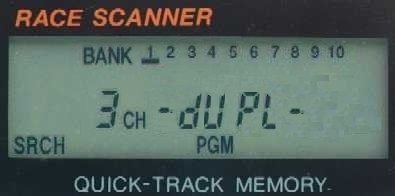
If you entered a frequency that is already stored in another
channel, -dUPL- (duplicate) and the lowest-numbered channel containing
the duplicate frequency flash for about 3 seconds.The example above shows the
display if the lowest channel with the frequency is channel 3.
- If you want to store the frequency in the new channel
anyway, press ENT again.
- If you do not want to store the frequency again, press MON/CL
to store the frequency in monitor memory (see below). The scanner continues to search. You
can then delete the frequency later.
|
| |
|
| Step 8: Store the Frequency in a Monitor Memory |
| |
 |
 |
| |
| To store the displayed frequency in a monitor memory, press MON/CL.
The monitor memory number, M, and the frequency flash twice. |
| |
|
| Step 9: Search for Another Active Frequency |
| |
 |
|
| |
| To search for another active frequency in the selected band, hold
down /\ or \/ for about 1 second. To select a different
band and search for another active frequency, repeat from Step 3. |
| |
|
| Step 10: End Band Search |
| |
 |
 |
| |
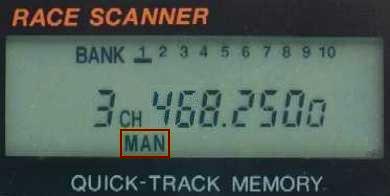
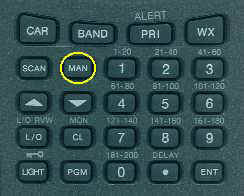
| When you are done, you can return to manual mode by pressing MAN. The display changes back to MAN. |
| |
|