PRO-93 (200-0523) and PRO-95 (200-0525)
Tutorial: How to Store Text Tags
The only difference between the PRO-93 and the PRO-95, is the number of channels each has; the PRO-93 having 300 channels and the PRO-95 having
1000. The method of programming for each is the same.
In this tutorial you will be
shown how to store text tags. You can customize your scanner by storing text tags (up to
12 characters) for easy identification of channel transmissions, trunk IDs, or banks.
This tutorial contains three
sub-tutorials and a chart:
For additional information on these products, see the links
below:
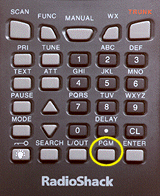
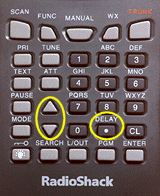
| Step
1: Enter the Programming Mode |
| |
 |
 |
| |
| Press PGM. |
| |
|
|
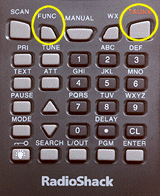
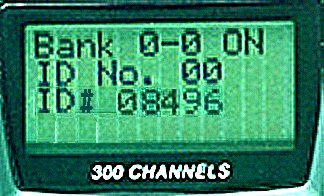
| Step
2: Enter Trunking Mode |
| |
 |
 |
| |
| Press TRUNK. Press FUNC then the UP
or DOWN arrow keys to select the desired group ID. In our example we used
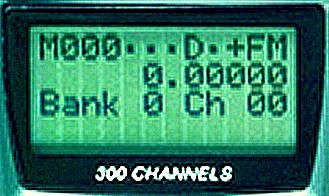
Bank 0, so we didn't change anything on the screen at this point. Press TRUNK
again. |
| |
|
|
| Step
3: Select the Group |
| |
 |
 |
| |
| Press or hold down the UP or DOWN
arrow keys to select the desired group ID. |
| |
|
|
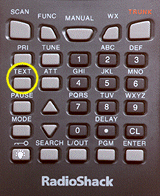
| Step
4: Enter Text Mode |
| |
 |
 |
| |
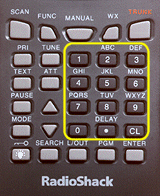
| Press TEXT then enter the tag using the keypad.
(See the "Text Input Chart" at the end of this tutorial.) |
| |
|
|
| Step
5: Store the Text |
| |
|
 |
| |
| Press ENTER to store the text. |
| |
|
|
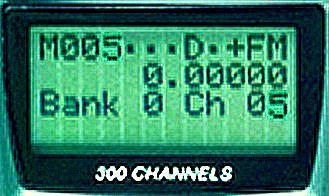
| Step
1: Select a Channel |
| |
 |
 |
| |
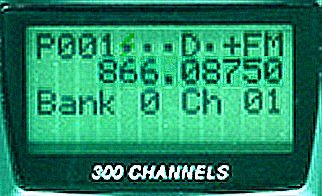
| Select a channel within the desired bank by pressing MANUAL
and entering the bank number (000 for bank 0 or 200 for bank 2, for example.) Press MANUAL
again. |
| |
|
|
| Step
2: Enter Programming Mode |
| |
 |
|
| |
| Press PGM. |
| |
|
|
| Step
3: Enter the Text |
| |
 |
 |
| |
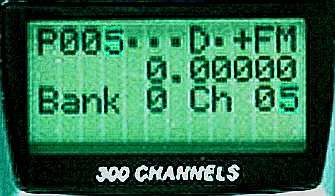
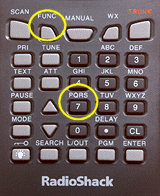
| Press FUNC then 7. The cursor
appears at the third line of the display. Enter the text using the keypad.
(See "Text Input Chart" at the end of this tutorial.) |
| |
|
|
| Step
4: Store the Text |
| |
 |
|
| |
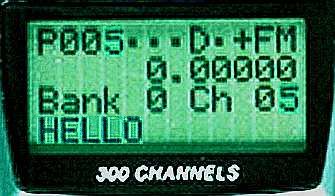
| Press ENTER to store the text. |
| |
| Back to top |
- To access the numbers, after you press TEXT
(when you assign the text tag to a channel) or you press FUNC and 7
(when you assign the text tag to a bank), press 1. Then press the desired
number you want to enter.
- To enter a lowercase character or a character from the
second set for key 0, press FUNC after pressing the
first number key.
BUTTONS
PRESSED |
CHARACTERS
ENTERED |
BUTTONS
PRESSED |
CHARACTERS
ENTERED |
| 1 |
0 1 2 3 4 5 6 7 8 9 |
2 |
A B C |
2
then
FUNC |
a b c |
3 |
D E F |
3 then
FUNC |
d e f |
4 |
G H I |
4
then
FUNC |
g h i |
5 |
J K L |
5
then
FUNC |
j k l |
6 |
M N O |
6
then
FUNC |
m n o |
7 |
P Q R S |
7
then
FUNC |
p q r s |
8 |
T U V |
8
then
FUNC |
t u v |
9 |
W X Y Z |
9
then
FUNC |
w x y z |
0 |
. - # _ @ + * &
/ , |
0
then
FUNC |
$ % ! ^ () ? ->
' <- |
./DELAY |
Space |
| CL |
Back Space |
|
|
Back to top
Copyright©
RadioShack Corporation 2002. All rights reserved.
Privacy Policy