This is an introduction to programming conventional (non-trunking) frequencies into your PRO-94 scanner. This tutorial will involve programming a frequency into either Bank "A" or "B", selecting which channel number to store a frequency in and storing the frequency. It will also show you how to set the delay to the "on" or "off" mode. For this tutorial, frequency 866.1625 will be stored in Bank A with delay off.
For additional information on this product, see the links below:
Step 1: Enter Manual Mode | |
![]() |
|
Press MAN. MAN will appear on the display. | |
Step 2: Select the Bank | |
![]() |
|
Hold down A/B (HOLD) for about 2 seconds to select
either main group "A" or "B". 
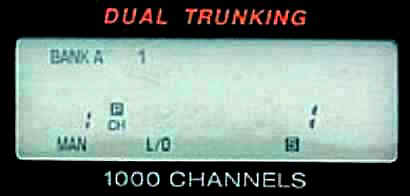
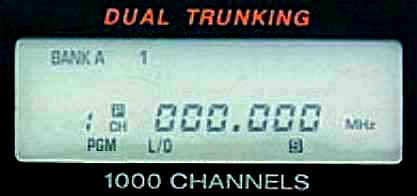
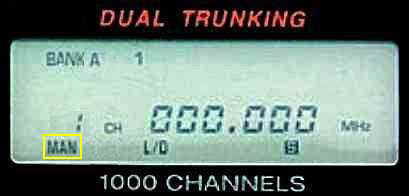
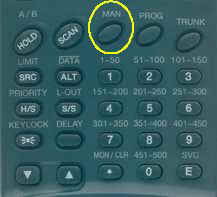
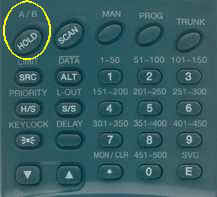
Note: When you are first programming the scanner (or after you reinitialize), it defaults to main group A; pressing A/B (HOLD) will changes to main group B, as above. For our example, we will be working in main group A. If B is displayed, press A/B (HOLD) to go to main group A. |
|
Step 3: Select the Channel | |
![]() |
|
Use the number keys (0-9) to enter the channel number where you want to store a frequency. | |
Step 4: Enter Program Mode | |
![]() |
![]() |
Press PROG. The channel number you chose and PGM appear on the display. L/O (lock-out) appears at the bottom of the screen when a channel is locked out or empty (000.000). | |
Step 5: Enter the Frequency | |
![]() |
![]() |
Use the number keys (0-9) and MON/CLR (.) to enter the frequency (including the decimal point) you want to store. We have entered the frequency 866.1625. | |
Click Here for the Police Call Frequency Books | |
Step 6: Store the Frequency | |
![]() |
![]() |
Press E (SVC) to the store the frequency into the channel. | |
Step 7: Clear a Mistake | |
![]() |
![]() |
If you entered an invalid frequency in Step 5, Error appears and the scanner beeps three times. Use the number keys (0-9) to enter a valid frequency. | |
Step 8: Store the Delay Setting | |
![]() |
![]() |
Press DELAY to pause scanning 2 seconds after the end of a transmission before scanning proceeds to the next channel. The scanner stores the setting for each channel individually. When delay is set to "on", DLY will appear on display as above. The rest of the tutorial is in the delay "off" mode. You will need to press DELAY again to remove DLY. | |
Step 9: Program Additional Frequencies | |
![]() |
![]() |
To program the next channel in sequence, press PROG and repeat from Step 3. | |
Step 10: Return to Manual Mode | |
![]() |
|
Press the last channel number that you programmed, then press MAN to exit the programming mode. | |
Copyright© RadioShack Corporation 2002. All rights reserved.